Set up a feedback survey
This guide walks through creating a feedback survey with rating bands that route customers differently depending on how they rate their experience.
-
From the dashboard, open Feedback Surveys and select New Survey.
-
Set the survey name and branding.
-
Define your rating bands — the ranges of star values you want to treat differently. A common setup is one band for low ratings (1–3 stars) and one for high ratings (4–5 stars), but you can define as many bands as you need.
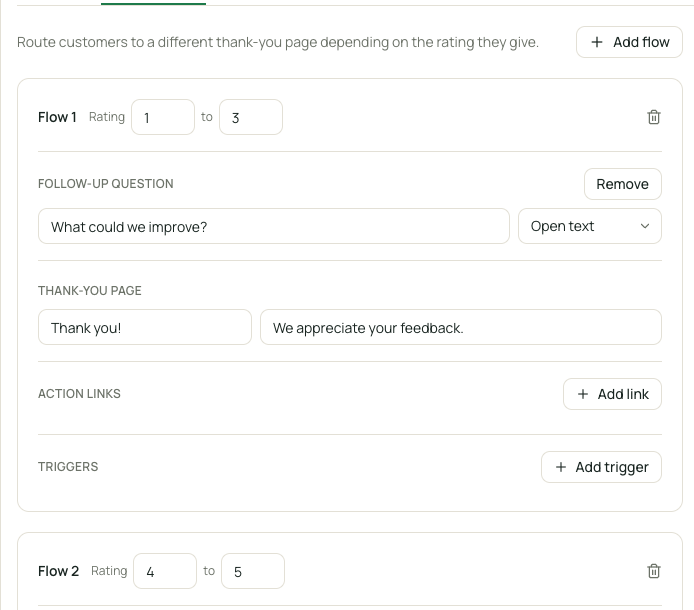
Defining rating bands -
For each band, configure:
- An optional follow-up question (for example, “What went wrong?” for low ratings)
- A “thank you” page
- An action/link type: Public Review, Reservation, Gift Card, Campaign, Manager Form, Recovery Offer, or Custom
-
For the high-rating band, this is typically where you link to a public review site like Google Maps. For the low-rating band, this is typically a private follow-up question instead of a public link.
-
Save and publish the survey.